How to Paint
on Silk - Equipment & Instructions
How to paint on silk. This is a guide to get you started painting on silk.
Equipment you will need:
 |
Silk - Pongee or Habotai are the most popular |
| |
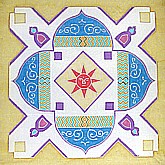
Silk painting pattern |
| |
Pencil |
|
Frame - You can buy a ready made frame or simply make one by glueing
and screwing 4 pieces of soft wood (eg: pine) together. Minimum 2cm x 2cm
thick. |
| |
Masking tape |
|
Silk Pins or drawing pins/thumb tacks |
| |
Silk Paint or Dye |
| |
Resist - Silk outliner or gutta |
| |
Paint brushes |
| |
Hairdryer |
Silk Paint or Dye?
There are 2 main colorants you can use to paint on silk. Paint or dye. Paint is
very easy to use and can be fixed (which means made permanent) by simply ironing for a few minutes.
With dye it would normally need to be steam fixed. This involves wrapping the silk in paper and
placing in a steamer for about an hour. The instructions for these come with the paints and
dyes.
Paint is great for a beginner or if you are doing a picture that doesn't require much movement of
the colours.
Dye has many great advantages over paint. It can be diluted with a little water to make it last
much longer without affecting the intensity of colour. Dye does not stick to the silk in the same
way that paint does which means that you can move it around on the silk using so many different
techniques, creating many exciting effects. It can be
thrilling to watch the colours change and create patterns and shapes in front of your eyes.
Instructions
1. Prepare your frame by putting a strip of masking tape along each side so that
none of the wood is exposed to the silk. This will protect it from the dye. When you want to do
another picture remove this tape and replace it with new, clean strips.
2. Wet your silk and pin to one side of your frame gently stretching it all the
time. Pin the opposite side again stretching your silk as you go. Then pin the other 2 sides in the
same way. Leave to dry or use a hairdryer. This will tighten the silk so it should be like a
drum.
3. Using the masking tape stick the pattern to the back of the silk and trace it
onto the silk using a pencil.
TIP: If there are parts of the pattern that you are going to use the outliner on after you have
dyed or painted your silk you should trace this firmly with a dark pencil so that you can still see
it through the paint/dye.
4. Now outline your picture using your resist, pressing firmly and evenly but
not too hard. Once you have finished check the back of your silk and make sure the outliner has
penetrated the silk and there are no gaps in the lines.
5. Once the outliner has dried you can start painting. Do not overload your
brush. You only need a tiny amount of paint as it will spread far and you do not want it to escape
over your resist.
6. If you have used iron fix paint you will need to iron your silk with a medium
hot iron for 3 or 4 minutes moving the iron constantly so as not to burn your silk.
7. If you have used chemical fixed dyes then you will need to paint a liquid
fixative over your finished silk.
8. If you have used steam fixed dyes and you do not have a silk steamer a
vegetable steamer will do. Roll your silk up in a clean piece of paper (old newspaper will do but
keep it for a few weeks before using it), fold the edges toward each other at the centre of the
roll and tape to hold it together. Fill the bottom of your steamer with water but not high enough
to touch the basket your vegetables would sit in. Make a bowl with some tin foil and place your
rolled up silk into this. Make a lid out of tin foil, put this over your bowl and gently fold the
edges of the bowl and lid together so that water cannot get into this while it is steaming. Put the
bowl into the basket in the steamer and put the lid on the steamer. Steam gently for about an hour.
You can also steam the silk suncatchers in the same way.
|














 SECURE
& CONFIDENTIAL
SECURE
& CONFIDENTIAL